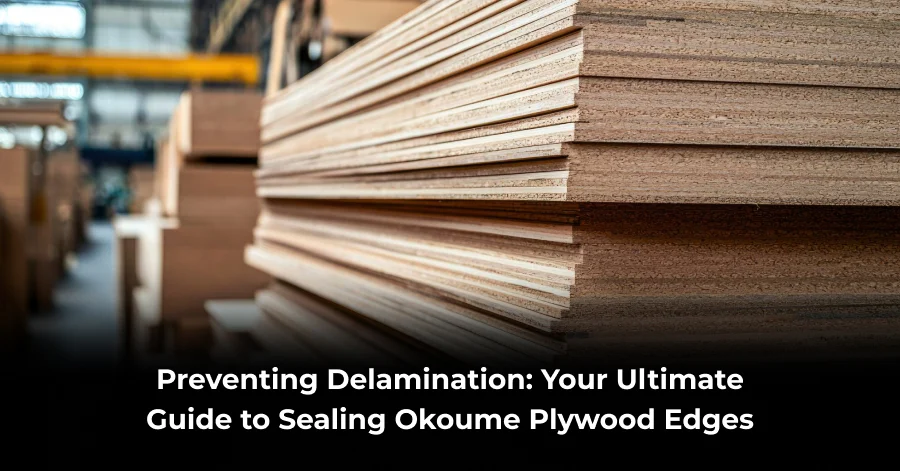
There’s a moment in every woodworker’s project—whether you’re building a graceful skiff, a custom piece of cabinetry, or a stylish piece of furniture—when the materials arrive, and the vision starts to become tangible. If you’ve chosen Okoume plywood for your latest endeavor, you’ve already made a fantastic decision. Renowned for its light weight, beautiful grain, and workability, this material is a favorite among boatbuilders and fine furniture makers alike.
But here’s the catch: that beautiful project can be undone by a single, often-overlooked vulnerability—the edges. Okoume marine plywood is engineered with waterproof glue, but its core layers, particularly the porous Okoume veneers, are like tiny straws, eagerly sucking up moisture from the exposed edges. This leads to the heartbreak of delamination: the swelling, peeling, and separation of the plies that can ruin your hard work.
Fear not! This isn’t a flaw in the material; it’s a call to action. Sealing the edges of your Okoume plywood isn’t just a suggested step; it’s the most critical insurance policy you can buy for your project’s longevity. This guide is your ultimate, human-to-human walkthrough for doing it right, ensuring your creation stays beautiful for years to come.
Why Okoume Plywood is Worth the Extra Care
First, let’s appreciate why we’re going through this trouble. Okoume plywood, often referred to as Okoume marine plywood when built with waterproof adhesives, comes from the Gaboon tree in Africa. Its signature traits are its incredible strength-to-weight ratio and its exceptionally smooth, knot-free face veneers. It bends beautifully, finishes like a dream, and is the gold standard for applications where every ounce matters.
You’ll find this premium material at any dedicated woodworking supplies store, but it’s not a commodity product like standard sheathing plywood. Its quality commands a higher price, and protecting that investment is simply smart woodworking. Think of the edge-sealing process not as a chore, but as the final, crucial step in the milling process, one that honors the quality of the material itself.
The Enemy of Your Project: Understanding Delamination
To defeat the enemy, you must know it. Delamination occurs when moisture infiltrates the edge of the panel. The thin veneers of wood absorb this moisture at different rates, expanding and creating internal pressures. Since the waterproof glue between the plies is stronger than the wood fibers themselves, the fibers tear and separate, causing the layers to push apart.
This doesn’t just happen from a direct splash. Humidity, condensation, and even the slow, persistent moisture in a garage workshop can wick into those exposed end grains. A project made with Okoume marine plywood for a boat might see immediate and dramatic failure, while a piece of furniture might slowly swell and distort over a year or two. The result is the same: a compromised structure and a damaged aesthetic.
Also Read- How Augmented Reality is Changing the Way We Choose Hardwood Floors
Your Arsenal: Choosing the Right Sealant for Okoume Plywood
Not all sealants are created equal. The “best” one depends on your project’s final finish and its intended environment. When you walk into a woodworking supplies store, you’ll be faced with a wall of options. Let’s break down the champions for sealing Okoume plywood edges.
- Epoxy Resin: The Gold Standard
For any project that will live in a harsh environment, especially boats, epoxy is king. It’s a two-part system that creates a rock-hard, completely impermeable barrier.
- How to Use: Mix the resin and hardener as directed. Using a disposable brush or a squeegee, work the epoxy into the edge, ensuring it soaks deep into the pores. You may need multiple coats for a fully filled, glass-smooth edge.
- Pro Tip: After the first coat tacks up but is still slightly sticky, you can apply a second coat for a perfect fill. You can then sand it smooth and paint over it seamlessly.
- Best For: Boat building, outdoor furniture, and any project where maximum moisture resistance is non-negotiable.
- Thin CA (Cyanoacrylate) Glue: The Quick Fix
For smaller projects or when you need to seal edges before routing or shaping, thin CA glue (super glue) is a wizard. It’s water-thin and wicks deep into the wood fibers, instantly hardening and sealing them.
- How to Use: Simply run a bead along the edge and watch it disappear. It sets in seconds. Be sure to work in a well-ventilated area.
- Pro Tip: This is perfect for stabilizing the edges before using a router to create clean, tear-out-free profiles.
- Best For: Small-scale projects, model building, and pre-treating edges for machining.
- Sanding Sealer or Shellac: The Finisher’s Friend
If your project is for interior use and you plan to use a film-forming finish like lacquer or varnish, sanding sealer (often a dewaxed shellac) is an excellent choice.
- How to Use: Brush or spray on multiple coats, sanding lightly between them. It builds a surface that seals the pores and provides a uniform base for your topcoat.
- Pro Tip: Shellac is a fantastic primer and sealer that is compatible with almost all other finishes.
- Best For: Furniture, cabinets, and interior projects where a clear, fine finish is the goal.
- Specialized Edge-Banding Sealers
Some woodworking supplies store retailers carry products specifically designed for this task. These are often epoxy-based or high-solids content sealers that are easy to apply and sand.
What to Avoid: Standard wood glue or PVA glue forms a surface film but doesn’t penetrate deeply enough to be a reliable moisture barrier. Water-based polyurethane can raise the grain and require significant sanding. For critical applications, stick with the proven champions above.
The Step-by-Step Process to a Bulletproof Seal
Let’s walk through the foolproof process. Remember, preparation is 90% of the success.
- Start with a Clean, Sharp Cut: The best sealing begins with the cleanest edge. Use a sharp blade in your table saw or circular saw to minimize tear-out. A ragged edge has more exposed fibers and is harder to seal effectively.
- Sand for Smoothness: Lightly sand the edge with 120-grit sandpaper to remove any splinters and fuzz. This creates a uniform surface for the sealant to adhere to. Blow off or vacuum the dust thoroughly.
- Apply Your Chosen Sealant: This is the main event. Whether you’re using epoxy, CA glue, or shellac, apply it liberally. For epoxy, work it in with a brush, ensuring it soaks into every layer of the Okoume plywood. For thin CA glue, watch as it gets sucked into the core.
- Let it Cure Completely: Patience is a virtue. Do not rush the curing process. Follow the manufacturer’s instructions for full cure time. A surface that is dry to the touch may not be fully cured internally.
- Sand and Finish: Once fully cured, sand the sealed edge smooth. You may find that the first coat of sealant raises the grain; that’s normal. Sand it back and apply a second coat if necessary. You now have a perfectly sealed, stable base for your paint, varnish, or oil.
Beyond the Edge: A Holistic Approach
While the edges are the primary entry point, don’t forget that Okoume marine plywood, while durable, benefits from full protection. A well-sealed edge is useless if the face veneers are left bare to the elements. Ensure your finishing plan includes protecting the entire piece. A good quality marine-grade paint system or spar varnish over the sealed edges and faces will create a complete, resilient shell.
Your Trusted Source: Why AEW Woods is the Woodworker’s Choice
When you’re undertaking a project that demands the best, sourcing your materials from a reputable supplier is paramount. This is where AEW Woods shines. For decades, AEW Woods has been a cornerstone for craftsmen, builders, and hobbyists seeking high-quality, specialty woods.
What sets AEW Woods apart isn’t just their inventory; it’s their expertise. The team at AEW Woods understands the unique properties of materials like Okoume plywood. They don’t just sell you a sheet of wood; they are a partner in your project, often providing invaluable advice on exactly the kind of sealing and finishing techniques we’ve discussed. When you buy your Okoume marine plywood from a dedicated woodworking supplies store like AEW Woods, you’re not just making a purchase—you’re tapping into a deep well of knowledge. Their commitment to quality and customer success makes them more than a vendor; they are an essential resource for anyone serious about woodworking.
Conclusion
Working with Okoume plywood is a joy that leads to stunning, lightweight, and strong creations. By understanding its one key vulnerability and taking the simple, proactive step of sealing its edges, you elevate your work from “good” to “professional-grade” and ensure it stands the test of time. This process is the mark of a craftsman who respects their materials and their craft. So, the next you pick up a sheet of beautiful Okoume marine plywood from your favorite woodworking supplies store, remember that the final touch starts at the very edge. And for the best materials and the best advice, remember that experts like those at AEW Woods are there to help you build something truly extraordinary.
Frequently Asked Questions (FAQs)
Q1: Can I just use multiple coats of paint to seal the edges of my Okoume plywood?
A: While paint provides a good barrier for the surface, it is not sufficient as a standalone edge sealant. The thin film of paint can crack or be imperfect, allowing moisture to penetrate the underlying porous layers. It is always best to use a penetrating sealant like epoxy first, then paint over it for a complete, durable finish.
Q2: I’m building an interior bookshelf. Do I really need to go through all this trouble?
A: For interior projects in climate-controlled spaces, the risk is lower, but it’s still a best practice. Sealing the edges prevents them from absorbing ambient humidity, which can cause slight swelling and make the edges look rougher than the faces over time. It also creates a much smoother surface for finishing, resulting in a more professional look.
Q3: Is all Okoume plywood automatically marine-grade?
A: No, this is a crucial distinction. “Okoume” refers to the wood species. “Marine-grade” denotes that the plywood is made with waterproof glue (typically phenol-formaldehyde) and has a higher veneer quality with fewer core voids. Always confirm you are buying Okoume marine plywood from your woodworking supplies store for marine applications.
Q4: How long should I wait after sealing the edges before I can sand and paint?
A: This depends entirely on the sealant. Thin CA glue is ready in minutes. Epoxy can be touch-dry in a few hours but should be allowed to cure fully for 24 hours before sanding. Always refer to the technical data sheet of the product you are using for the most accurate recoat and sanding times.
Q5: My project is already built, and I forgot to seal the edges. Is it too late?
A: It’s never too late! While it’s easier to seal the edges on a flat sheet before assembly, you can still effectively seal a built project. Carefully apply your chosen sealant (a small brush or even a syringe for tight spaces can help) to all exposed edges. It might be a bit messier and more time-consuming, but the protection it offers is just as valuable.


