There’s a unique satisfaction that comes from working with Okoume plywood. That moment you unload the sheet from your car—noting its surprising lightness—and run your hand across its surface, you understand why it’s a favorite among craftsmen. Its fine, consistent grain and absence of voids make it a dream canvas. But this beautiful canvas is also vulnerable. Without a proper finish, a spilled glass of water, a splash of salt spray, or even just the humidity in the air can dull its beauty and compromise its structure.
Finishing isn’t merely the last step; it’s the crucial process that transforms your hard work from a vulnerable project into a resilient masterpiece. This is true whether you’re using standard Okoume plywood for a living room cabinet or Okoume marine plywood for a kayak. This comprehensive guide will walk you through every stage, ensuring you achieve a finish that offers maximum protection and does justice to the inherent beauty of this exceptional Okoume timber.
Why Finishing Okoume is Non-Negotiable
Understanding the “why” behind finishing fuels the patience needed for the “how.” Okoume plywood is renowned for its workability, but its open pores and relatively soft surface make it susceptible to a host of enemies:
- Moisture: This is the biggest threat. Unsealed, the layers of plywood can absorb ambient moisture, leading to swelling, delamination, and eventually, rot. This is especially critical for Okoume marine plywood projects, which are constantly exposed to water.
- Physical Damage: Its softness means it’s prone to dents, scratches, and scuffs from daily use. A hard finish acts as a sacrificial shield.
- UV Radiation: Sunlight can bleach the beautiful reddish tone of Okoume into a dull gray and weaken the wood fibers over time.
- Dirt and Stains: The porous surface can absorb oils, dirt, and spills, leaving permanent marks.
A well-applied finish directly counters these threats. It seals the wood, enhances its natural character with depth and richness, and provides a durable, protective shell that ensures your creation lasts for years to come.
Your Step-by-Step Guide to a Flawless Finish
Step 1: Gathering Your Supplies
Walking into a woodworking supplies store with a list ensures you get the right products for the job. Don’t underestimate the importance of quality tools here; a cheap brush can leave streaks and bubbles that ruin an otherwise perfect coat.
- Sandpaper & Abrasives: Invest in a range of grits. You’ll need 120-grit for initial leveling, 150-grit and 180-grit for smoothing, and 220-grit (and higher) for final pre-finish preparation. A sanding block is essential for flat surfaces, while an orbital sander will save time on larger projects.
- Tack Cloth: This sticky, cheesecloth-like material is designed to pick up every speck of dust after sanding. A lint-free rag slightly dampened with mineral spirits can also work.
- Wood Filler: For a pristine look, you’ll want to fill the laminated edges. Use a stainable wood filler if you plan to clear-coat, or any standard filler if you will be painting.
- Your Chosen Finish: See the breakdown below for choosing the right one.
- Application Tools: High-quality natural bristle brushes for oil-based finishes, synthetic brushes for water-based, or foam applicators for a streak-free application on large, flat surfaces. A spray gun offers the most professional result for lacquers and varnishes.
- Safety Gear: Nitrile gloves, safety glasses, and a respirator mask are crucial, especially when working with oil-based products or spraying finishes.
Step 2: The All-Important Sanding Process
This step cannot be rushed. The quality of your sanding dictates the quality of your final finish.
- Start Coarse, End Fine: Begin with 120-grit sandpaper to remove any machine marks, glue splatter, or to level the edges. Always sand parallel to the grain to avoid unsightly cross-grain scratches. Progress sequentially to 150-grit and then 180-grit, each time removing the scratches from the previous, coarser grit.
- Final Smoothing: Switch to 220-grit for the final sanding on the face. For a truly glass-like surface, especially if you’re using a film-building finish like varnish, a final pass with 320-grit will make the wood incredibly smooth to the touch.
- Dust Removal: After sanding, vacuum the entire piece. Then, go over it meticulously with a tack cloth. Wipe in one direction to avoid just redistributing the dust. For a final assurance, wipe the surface with a rag dampened with mineral spirits (which will also raise the grain slightly—see Pro Tip).
*Pro Tip: After your final sanding with 220-grit, wipe the surface with a damp rag. This “raises the grain,” causing any loosened wood fibers to stand up. Let it dry, then lightly sand again with 220 or 320-grit. This ensures those fibers are gone and won’t swell up under your first coat of water-based finish.*
Step 3: Choosing Your Finish (The Fun Part!)
Your choice here is the biggest determinant of both the look and the level of protection.
- For Indoor Furniture (Clear Look):
-
-
- Oil-Based Finishes (Tung Oil, Danish Oil): These penetrate deep into the Okoume timber, highlighting the grain with a warm, rich amber tone. They offer a natural, matte feel that is easy to repair but provides only moderate protection against liquids and heat.
- Water-Based Polyurethane: This has become the go-to for many. It adds a clear, durable coating without the yellowing effect of oil-based products. It’s low-odor, dries quickly, and is very resistant to water and chemicals.
- Lacquer: Applied via spray gun, lacquer dries in minutes and can be built up to a very hard, durable shell. It requires more skill and equipment but offers a supremely professional result.
-
- For Outdoor or Marine Use (Maximum Protection):
-
-
- Marine-Grade Spar Varnish: The only choice for Okoume marine plywood. Its配方 includes UV blockers to prevent sun damage and additives that allow it to remain flexible with the wood’s expansion and contraction. Apply a minimum of 5-6 coats for a boat hull.
- Epoxy Resin: For the ultimate waterproof barrier. A clear epoxy coat will completely seal the wood. However, epoxy is not UV stable and must be top-coated with several layers of spar varnish if exposed to sunlight.
-
- For a Painted Finish:
-
- Primer is Key: Okoume’s tannins can bleed through paint, causing yellow stains. Always use a high-quality, stain-blocking shellac-based or oil-based primer. Sand the primed surface smooth with 320-grit before applying your topcoat of acrylic or oil-based paint.
Step 4: Applying the Finish
- Environment: Work in a clean, well-ventilated, and dust-free space. Ideal temperature is between 65-75°F (18-24°C) with low humidity.
- Stir, Don’t Shake: Gently stir your finish to avoid creating tiny bubbles that will cure on your surface. If using a two-part epoxy, follow the mixing instructions precisely.
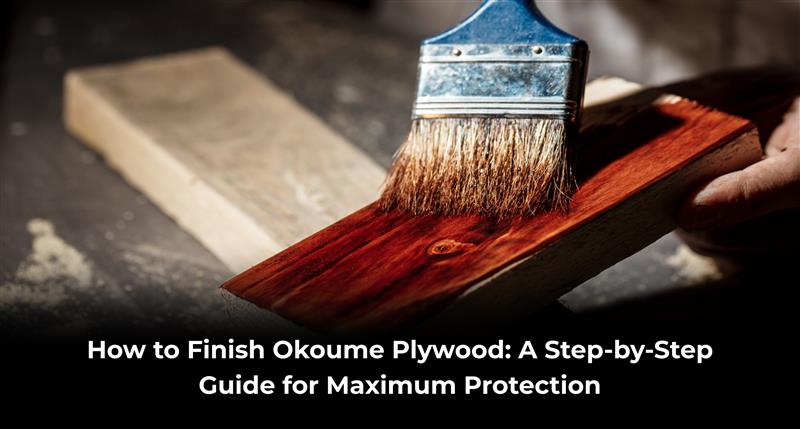
- Thin Coats are King: Apply the first coat as a “seal coat”—thinned if the product instructions allow. Use long, smooth, overlapping brush strokes following the grain. A thin coat dries faster and harder and is less likely to run.
- Sand Between Coats: Once a coat is fully dry (refer to the product’s dry time), lightly sand the entire surface with 320-grit sandpaper. Your goal is not to remove the finish, but to “de-nib” it—knocking down any dust particles that landed on the surface and creating a slight texture for the next coat to grip onto. Wipe away all dust completely.
- Repeat: Apply your second coat. For water-based polyurethane, 2-3 coats may suffice. For a rich, deep look with oil or for marine varnish, 4-6 coats are standard.
Step 5: The Final Cure
Patience is a virtue. The finish may be dry to the touch in hours, but it can take weeks to fully cure and achieve its maximum hardness and chemical resistance. Avoid placing objects on or heavily using your project during this time. Once fully cured, your finished Okoume plywood project will be a testament to your skill and care.
Also Read: 5 Stunning DIY Projects You Can Build with Okoume Plywood
Your Source for a Perfect Foundation: AEW Woods
Every great finish is built upon a great foundation. The quality of your Okoume plywood directly impacts how well it accepts and holds a finish. Low-grade sheets with rough veneers, voids, or inconsistent glue lines will undermine all your careful preparation.
This is why discerning woodworkers and boat builders turn to AEW Woods. They specialize in supplying premium Okoume timber products, including both standard and marine-grade plywood. Their sheets are known for their exceptional flatness, void-free cores, and flawless face veneers that sand to a perfect smoothness. By starting with a superior panel from a trusted supplier like AEW Woods, you eliminate variables and set the stage for a finishing process that is smooth, predictable, and guaranteed to yield stunning, professional-grade results.
Conclusion
Finishing Okoume plywood is a rewarding journey that bridges the gap between raw potential and finished masterpiece. It’s a process that demands patience, attention to detail, and the right materials, but the payoff is immense. A well-executed finish doesn’t just protect your investment of time and money; it elevates the natural elegance of the wood, revealing depth and character that raw timber alone cannot show. It transforms a project from simply being “built” to being “crafted.”
Remember, this process starts long before you open a can of varnish. It begins with selecting a high-quality panel from a reputable source like AEW Woods. By combining superior materials with careful technique, you equip your creation to face the years ahead with resilience and beauty. So take a deep breath, embrace the methodical steps, and enjoy the profound satisfaction of applying that final coat, knowing you have truly mastered the art of the finish.
Frequently Asked Questions (FAQs)
Q1: Can I use regular varnish on Okoume marine plywood for a boat?
A: No. Standard varnish will crack and peel when exposed to constant sunlight and water movement. Marine-grade spar varnish is specifically formulated with UV inhibitors and flexibility to handle these conditions.
Q2: Why is my finish feeling sticky or not drying?
A: The most common causes are high humidity, cold temperatures, applying coats too thickly, or not stirring the product properly. Ensure you work in an environment within the parameters listed on the product can and always apply thin, even coats.
Q3: Do I need to seal Okoume plywood before painting?
A: Absolutely. Using a high-quality stain-blocking primer is essential. It seals the wood’s pores, prevents tannin bleed, and provides a uniform surface that ensures your topcoat of paint adheres properly and looks consistent.
Q4: How many coats of finish do I need?
A: It depends on the product and use. For indoor furniture with polyurethane, 2-3 coats often suffice. For a tabletop that will see heavy use, 4+ coats is better. For marine varnish, a minimum of 5-6 coats is recommended for full waterproof and UV protection.
Q5: Can I use a water-based finish on Okoume?
A: Yes, water-based polyurethane is an excellent, eco-friendly choice for indoor projects. It is important to note that water can raise the wood grain, so the “raise-the-grain” sanding step mentioned in the guide is highly recommended before your first coat.


