There’s a moment in every woodworking project where potential meets reality. You have a vision for a piece—a sleek cabinet, a graceful guitar body, or a modern furniture accent—and the material you choose becomes the bridge to bringing that vision to life. For countless craftsmen and artisans seeking a perfect blend of workability, beauty, and affordability, that material is Okoume veneer.
Known for its uniform texture, stunning pinkish-brown hue, and exceptional flexibility, Okoume is a favorite among luthiers, furniture makers, and marine craftsmen. But like any fine material, it demands respect and the right technique to unlock its full potential. Whether you’re a seasoned pro or a dedicated hobbyist sourcing your materials from a trusted woodworking supplies store, this guide will walk you through the essential steps of cutting, gluing, and pressing Okoume veneer to achieve flawless, professional results every time.
Getting to Know Okoume: More Than Just a Pretty Face
Before we dive into the workshop, let’s understand what makes Okoume wood so special. Harvested from the Gabon tree in West Africa, (often referred to as Okoume timber in its log form), it’s prized for its stability and light weight. In veneer form, these qualities are amplified.
- Appearance: Okoume veneer boasts a straight, sometimes interlocked, grain with a fine, uniform texture. Its color ranges from a pale salmon pink to a light reddish-brown, often with a subtle, captivating shimmer. It lacks the bold figure of some exotics, which is actually a benefit; its consistency provides a flawless canvas that doesn’t compete with design elements, making it perfect for contemporary pieces and painted finishes where a smooth substrate is key.
- Workability: This is where Okoume truly shines. It is remarkably easy to cut, sand, and shape. Its flexibility makes it ideal for compound curves, a key reason it’s the go-to choice for marine applications like boat hulls. When working with it, you’ll notice it doesn’t fight you. It sands to a silky-smooth surface without requiring excessive effort, and it takes a finish beautifully, absorbing stains and sealers evenly when properly prepared.
- Sustainability: When sourced responsibly, Okoume is a renewable resource. Look for vendors who provide transparency about their sourcing, ensuring your beautiful project is also an environmentally conscious one.
While this guide focuses on working with raw veneer, it’s worth noting that Okoume veneer plywood is a hugely popular and stable substrate, especially in marine construction. The techniques for veneering, however, apply to both applying raw veneer to a substrate and repairing or working with pre-made plywood.
The Trinity of Veneer Work: Cut, Glue, Press
Success in veneering hinges on three core processes. Master these, and you can conquer almost any project.
1. Cutting Okoume Veneer: Precision is Key
The first step is transforming your large sheet of veneer into the perfect-sized piece for your project. Okoume’s relatively forgiving nature makes this process enjoyable, but a meticulous approach pays dividends.
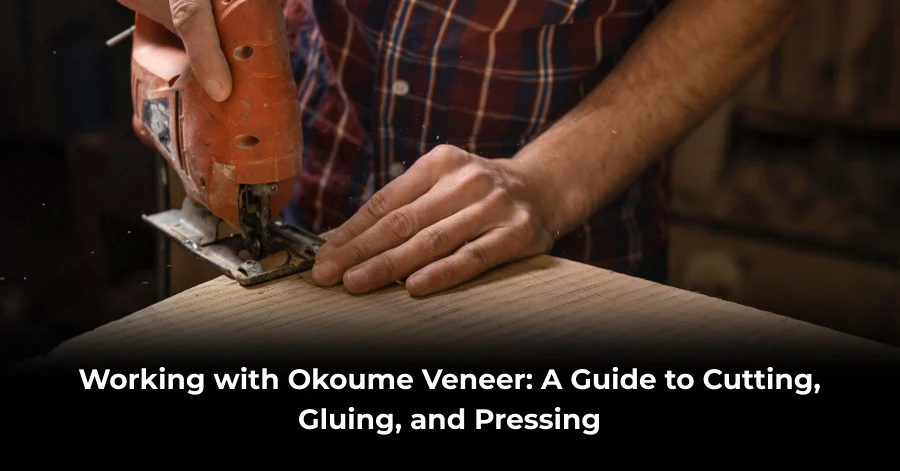
- The Tools: You have several options. A sharp utility knife with fresh blades and a solid metal straightedge are the classic, most controlled methods. For complex curves, a scalpel or a specialized veneer saw offers incredible precision. For high-volume work or intricate inlay patterns, a powered veneer saw or a laser cutter can’t be beaten for speed and accuracy. The key is sharpness; a dull blade will tear and splinter the delicate veneer, ruining your piece before you even start gluing.
- The Technique:
- Grain Direction: Always be aware of the grain. For the cleanest cut and to prevent tear-out, cut with the grain, not across it. If you must cut across the grain, score your line even more lightly and consider reinforcing the cut line with a piece of masking tape to help hold the fibers together.
- Scoring, Not Slicing: Don’t try to cut through the sheet in one pass. Use your straightedge as a guide and make three to four light, scoring passes with your knife, deepening the cut each time. This ensures a clean, splinter-free edge without forcing the veneer and causing it to split unpredictably.
- Support the Veneer: Make sure the veneer is fully supported on your cutting surface right up to the edge of your cut. An overhanging piece can and will splinter. Using a dedicated cutting mat or a piece of scrap MDF underneath protects your tools and your work surface.
Pro Tip: Always cut your pieces slightly oversized (about 1/2″ to 1″ larger on all sides). This “overhang” allows for any minor movement during the stressful gluing and pressing process and gives you clean, perfect edges to trim flush after the glue has cured, ensuring a seamless fit.
2. Gluing Okoume Veneer: Choosing the Right Bond
The adhesive you choose is the invisible foundation of your project. A failed glue joint is a heartbreak we all want to avoid. The porous nature of Okoume wood means it reacts well with most standard woodworking adhesives, but choosing the right one for your specific application is crucial.
- PVA (Polyvinyl Acetate) Glue: Your standard yellow or white woodworking glue. It’s a fantastic, easy-to-use option for most flat projects. The yellow variety, often called “carpenter’s glue,” typically has a slightly longer open time than white glue.
- How to use: Apply a thin, even layer to both the substrate and the veneer (a small foam roller is perfect for this). Wait for the glue to become tacky (refer to the manufacturer’s “open time”) before placing the veneer. This “cold press” method is critical as it prevents the glue from soaking through and staining the face of the Okoume, which can be nearly impossible to fix later.
- Veneer-Specific Glue: Many companies make glues designed explicitly for veneering. Some are pre-mixed, while others are a two-part system. They often have longer open times, giving you more room to maneuver and position larger sheets without the panic of the glue setting up too quickly. These are highly recommended for beginners.
- Contact Cement: The hero for non-porous substrates or vertical surfaces. It’s applied to both surfaces, allowed to dry until tacky (usually 15-30 minutes), and then the two are carefully joined. The bond is instant, so alignment is critical. Use dowels or a “slip-sheet” (a piece of paper between the surfaces that you slowly pull out) to help with perfect placement.
- Hide Glue: The traditionalist’s choice. It offers a long open time, is reversible with heat and moisture (great for future repairs!), and doesn’t gum up your tools when you trim the edges. It’s mixed with water and kept warm in a special pot, making it a more involved but deeply rewarding process.
The Golden Rule: No matter which glue you choose, the key is a thin, even coat. Too much glue creates a mess, can bleed through, weakens the bond, and adds unnecessary weight. Your goal is to just barely fill the pores of the wood.
3. Pressing Okoume Veneer: Applying the Pressure
This is where the magic happens—the marriage of veneer and substrate under pressure. The goal is consistent, even pressure across the entire surface to ensure every square inch is in contact with the substrate.
- Veneer Press: The ideal solution for flat panels. A typical press consists of two flat, rigid platens (often MDF) and a mechanism to apply pressure, like bolts or clamps around the perimeter. It’s a worthwhile investment if you plan to do a lot of veneer work. The larger the panel, the thicker and more rigid your platens need to be to prevent bowing, which would create areas of low pressure in the center of your panel.
- Vacuum Bag Pressing: The ultimate method for both flat and curved projects. A vacuum bag system uses atmospheric pressure (a whopping 14.7 psi at sea level) to apply a perfectly even, omnidirectional force. It’s incredible for complex shapes and ensures no weak spots. For working with flexible Okoume wood on curved guitar bodies, architectural elements, or boat components, a vacuum press is a game-changer. It can be a significant initial investment but opens up a world of design possibilities.
- Cauls and Clamps: For smaller projects or if you’re on a tight budget, you can use cauls (flat, stiff boards) and clamps. Place the cauls on top of the veneer and clamp them down, ensuring you have enough clamps to distribute the pressure evenly across the entire panel. Use a piece of wax paper between the caul and the veneer to prevent any glue from sticking. The challenge here is avoiding “clamp bounce,” where pressure is high directly under the clamp but low in between.
- Iron-On Method: For quick repairs, edge banding, or very small pieces, you can use a household iron. Spread PVA glue on the substrate, let it dry completely, then place the veneer on top and apply heat with the iron set to a medium-high setting. The heat reactivates the glue, creating a bond. Use a scrap wood block between the iron and the veneer to protect the surface and distribute heat.
Pressing Time: Always follow your glue’s instructions for press time. A good rule of thumb is to leave it under pressure for at least 4-8 hours, though overnight is always best. Rushing this step is a primary cause of veneer failure later on.
Why Your Source Matters: A Note on AEW Woods
Throughout this guide, we’ve talked about technique, but it all starts with the quality of your raw material. You can have the skills of a master craftsman, but if your veneer is poorly cut, inconsistently thick, or dried out, you’ll be fighting an uphill battle.
This is why choosing the right supplier is not just a purchase; it’s an investment in your project’s success. For woodworkers across the country, AEW Woods has established itself as a premier destination for high-quality wood products. They understand the nuances that makers care about—consistent grading, responsible sourcing, and a deep knowledge of their inventory, from raw Okoume timber to finished Okoume veneer plywood.
When you source your materials from a dedicated woodworking supplies store like AEW Woods, you’re not just buying a sheet of wood; you’re gaining a partner in your craft. Their expertise ensures you receive veneer that is stored correctly and is ready for the workshop, allowing you to focus on what you do best: creating beautiful, lasting pieces. The confidence that comes from using a premium product from a trusted source cannot be overstated.
Conclusion
Working with Okoume veneer is a journey in precision and patience, but one that is immensely rewarding. Its forgiving nature and stunning aesthetic make it a perfect material for elevating your woodworking projects from simple constructs to cherished pieces of art. By mastering the fundamentals of cutting with care, gluing with precision, and pressing with consistent pressure, you unlock the full potential of this remarkable wood.
Remember, great craftsmanship is a blend of skill, knowledge, and quality materials. By applying the techniques outlined in this guide and sourcing your supplies from reputable specialists like AEW Woods, you equip yourself to create work that is not only beautiful but built to last. So, embrace the process, trust your hands, and let the unique warmth of Okoume bring your next vision to life.
Frequently Asked Questions (FAQs)
- Is Okoume veneer good for outdoor use?
Raw veneer is not weatherproof. For outdoor use, it must be sealed with a robust, waterproof finishing system like epoxy and marine varnish, and even then, it’s best for protected applications. - How do I prevent my Okoume veneer from cracking when bending?
For tight bends, mist the back side with water and apply heat with an iron. This makes the fibers pliable and allows it to conform to sharp curves. - Can I stain Okoume veneer?
Yes, but always test first. Its pink hue can influence stain colors. Using a pre-stain wood conditioner is highly recommended for an even finish. - What’s the difference between Okoume veneer and Okoume plywood?
Okoume veneer is a thin sheet used to cover a substrate. Okoume veneer plywood is a structural panel made by gluing multiple plies of Okoume together. - My glue bled through the veneer. How can I fix this?
Once fully cured, carefully sand or scrape the glue spot. You may need to touch up the area with a light finish to blend it back in.


